DIY Utility Storage Shelves

Hi everyone!
Today I’m taking a few moments to talk about a little not-so-pretty topic: utility storage. Just about everyone needs it, not everyone has it, and no one really likes to deal with it. So the stuff sort of piles up. Maybe the pile-of-shame is in the basement, the garage, or even the attic? Wherever it is, it's probably not in an area of the house you're likely to show your guests. I mean, maybe you don't even go there much yourself. Guys and gals, I’m talking about real life stuff here. Those holiday decorations and the seasonal sports equipment. Skis, anyone? Maybe the kids’ camp things? What about all those cushions and pillows for outdoor furniture? Or in my case, all those partial cans of paint. And tile. I swear, I turn around, and they just multiply! Don't you hate when that happens? No? Ok fine, maybe what we're storing is different, but what we have in common is a need for a place and method to store it all.
I wanted to be able to load up the shelves without worrying about sagging or structural collapse so all those plastic shelving units were immediately out of the question and I very quickly found myself cruising in the big boy category of “industrial” shelving. It didn’t take long to realize that these various “kit” options either didn’t have the sizing I needed or are way more than I wanted to spend. Of course one benefit would be the ability to easily adjust the heights of the shelves, but once I stopped to think about it, that really wasn't so important to me because once it was all set up, honestly, it's not likely to get adjusted much. Or, to be completely honest, probably ever. So what’s a girl to do? Well, design and build it, of course!
First I listed out all the “things” that I wanted to store in the space, measured the space, and then just started sketching. I knew I didn’t want to have too many verticals in the front interfering with being able to easily store and access long items on the shelves, such as my snowboard bag. I also liked that one long open shelf would provide the most flexibility in allowing for different width combinations of items I might put along side each other.
Since the shelves wouldn't be easily adjusted in height, I wanted to make sure and plan ahead for the shelf spacing to be tall enough to allow for several sizes of bins and containers that I commonly use for all sorts of things - for me, those were a few sizes of those plastic storage bins and 5 gallon buckets.
- 20 gallon bin: 17” H x 19” W x 22” L
- 66 qt bin: 13” H x 16” W x 24” L
- 45 gal bin: 20” H x 21” W x 37” L
- 5 gal bucket: 15” H
I had a 13-foot long section to work with so it was only a quick mental hop and skip towards sketches of a 12-foot long shelf. And then I paused to have a serious internal conversation about whether I could feasibly transport 12 foot long lengths of lumber without causing a traffic incident. Yes, you know what I’m talking about. I decided against it. Safety first - both yours and others. Don't be "that guy." Ok PSA over.
I wanted to keep everything nice and simple - short materials list, simple (but strong) construction methods, minimal number of cuts. And of course keep waste to a minimum as well. In the end I settled on a simple 4-tier shelf, constructed of just two-by-fours and a few sheets of 3/4” plywood. Oh, and plenty of screws. Definitely don’t forget those.
So here’s where I landed with my sketch - nope, totally not to scale.
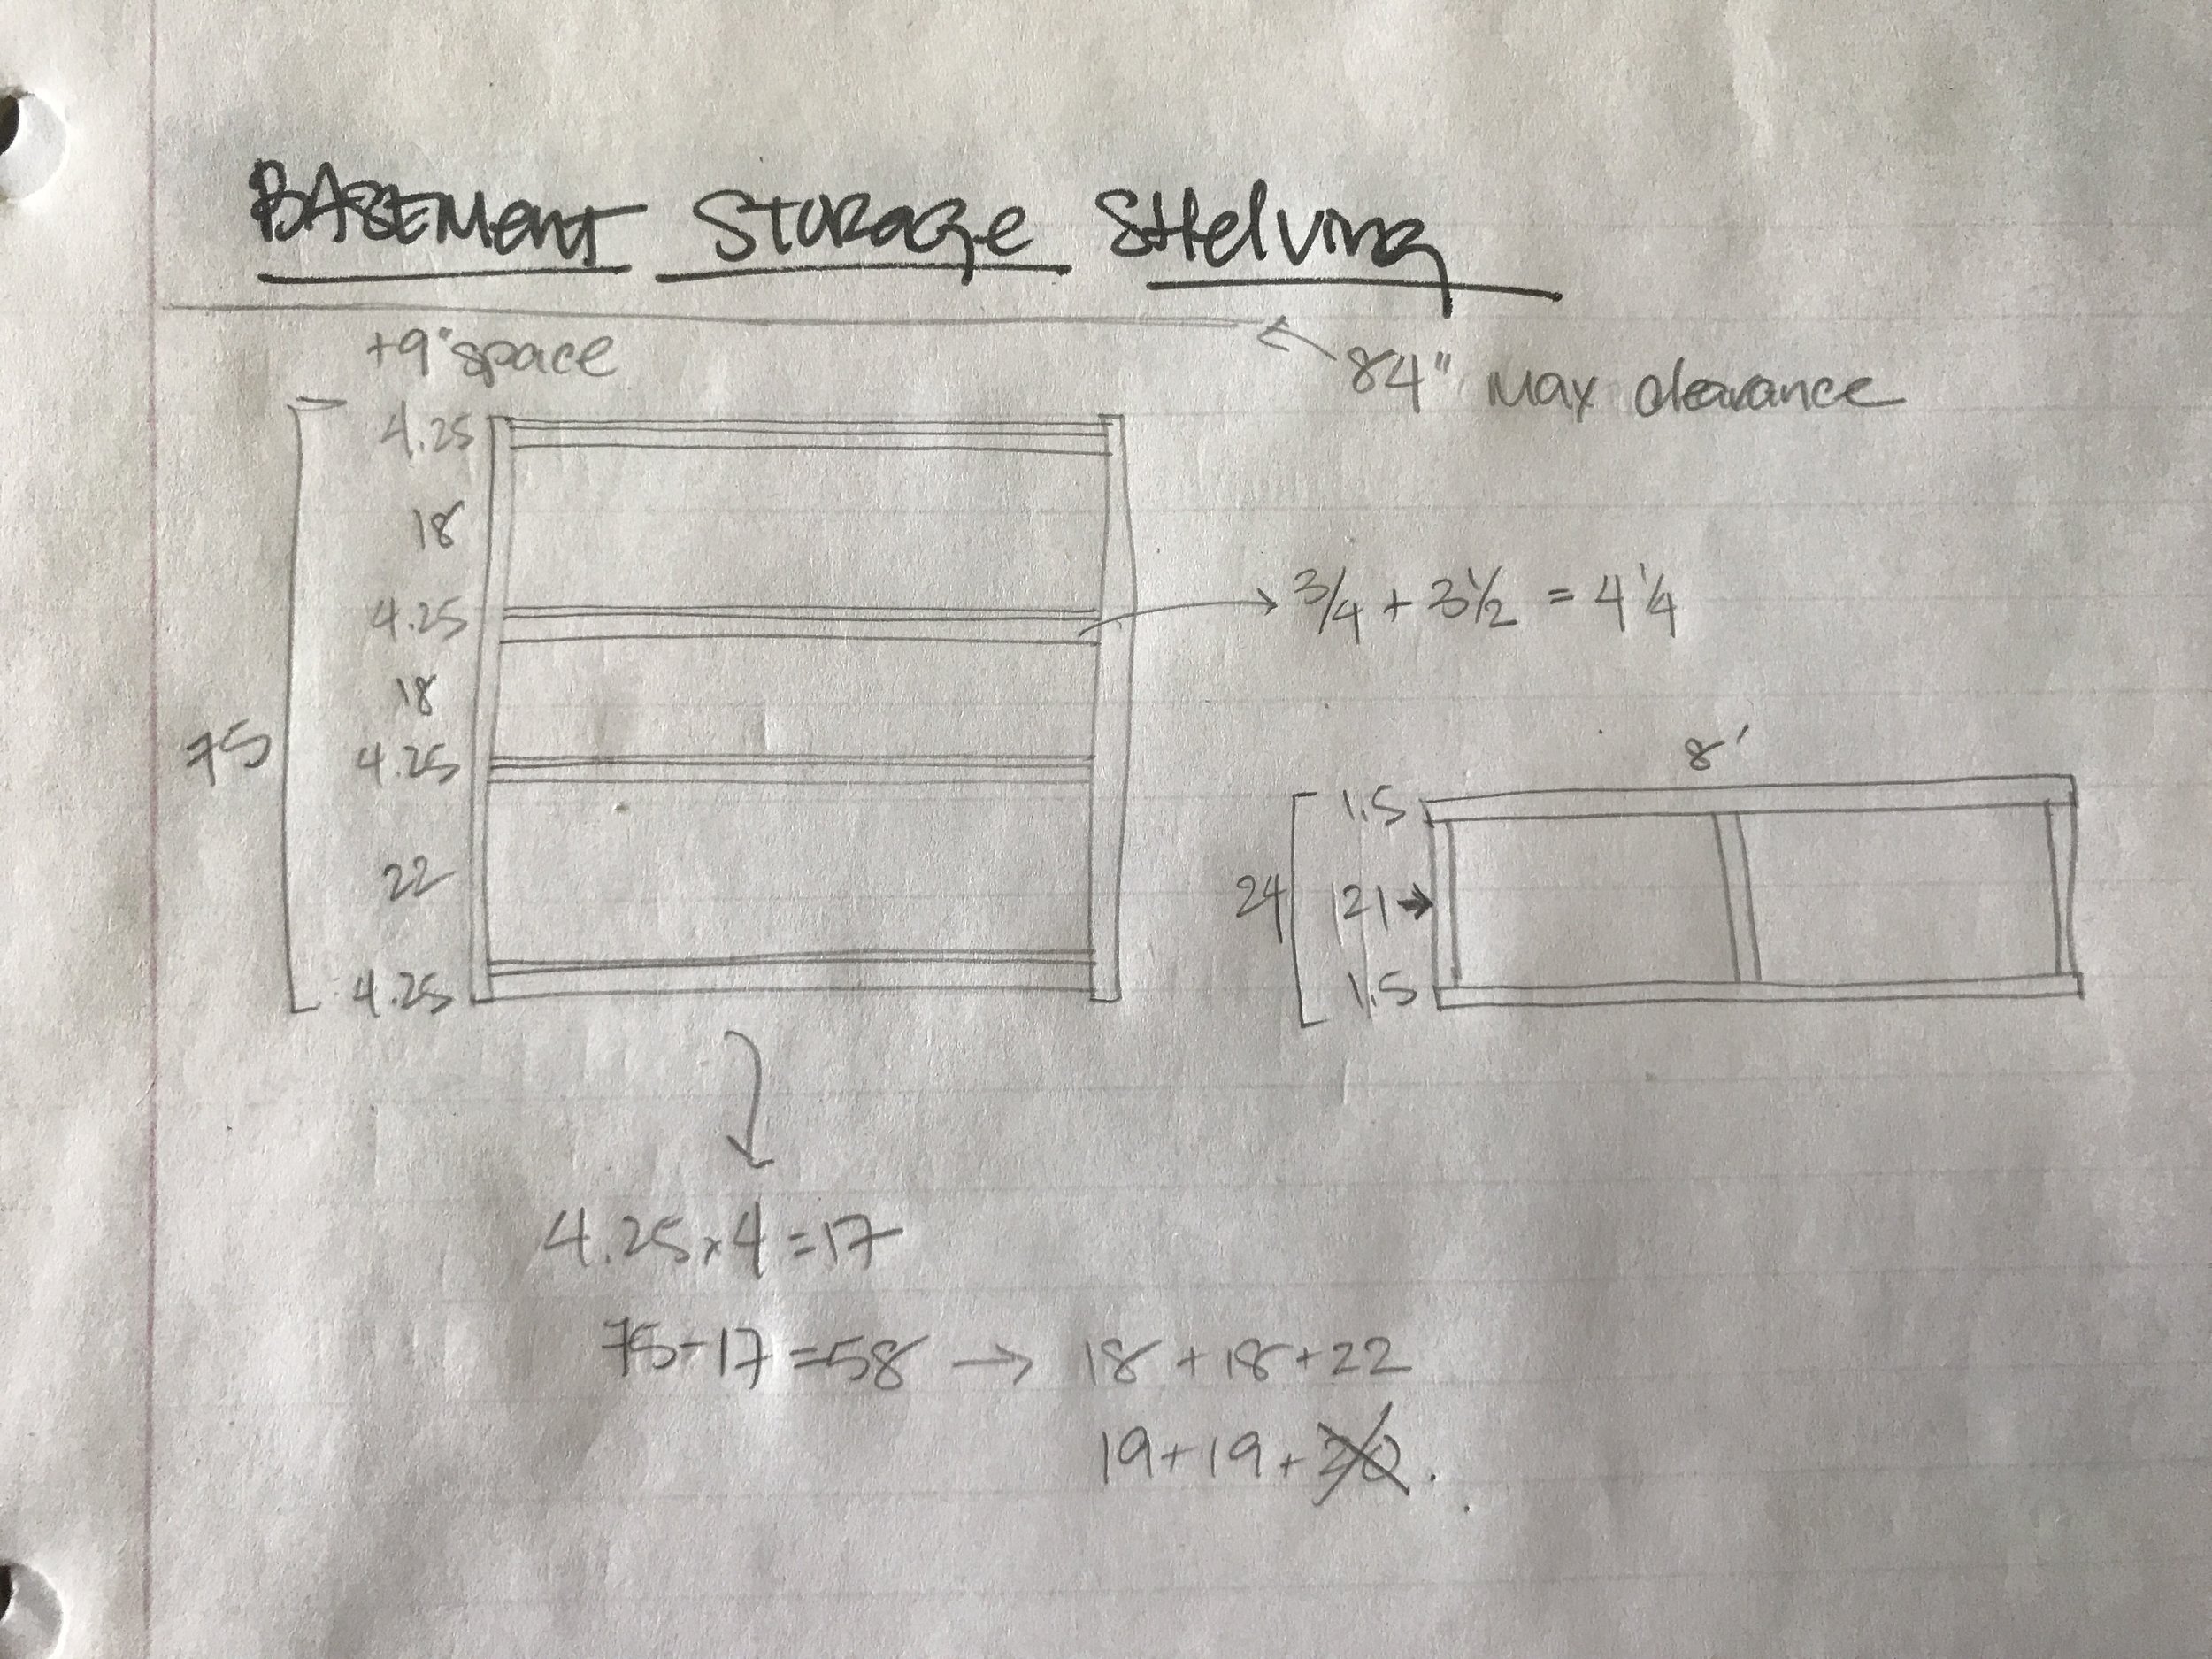
The following measurements are unique to my specific space but I’m including them to help follow along. My finished shelving unit was going to be 75” high and 8 feet wide, with four 2-foot deep shelves.
Here's my shopping list (linked for your convenience):
- 14 lengths of 2” x 4” x 8’
- 2 sheets of 2” x 4” x 8’ plywood, OSB or CDX/RTD
- Screws - at least 120 of them
Here’s my cut list:
- 8 lengths of 2” x 4” x 8’ - uncut
- 4 lengths of 2” x 4” x 8’ - each cut into (1) 75” piece and (1) 21” piece
- 2 lengths of 2” x 4” x 8’ - each cut into (4) 21’ pieces and (1) 12” waste piece
- 2 sheets of 4’ x 8’ x 3/4” plywood - ripped in half lengthwise
And this is what I should end up with:
- 8 pieces of 8’ long 2” x 4” - these would be the long parts of the frame for each of the 4 shelves
- 12 pieces of 21” long 2” x 4” - these would be the cross bars of the frame for each of the 4 shelves
- 4 pieces of 75” long 2” x 4” - these would be the legs of the whole unit
- 4 pieces of 2’ x 8’ x 3/4” plywood - these would be the tops of each shelf
- 2 pieces of 12” long 2” x 4” - these would be the only waste for this project
Armed with my shopping list, cut list and end-result check list, I plugged in the battery charger for the drill and headed off to the store. I wasn’t too picky about the lumber, but I did make sure to give the two-bys a quick check for reasonable straightness (some of them most certainly were not even close). It's typically better if you can get to the pieces that are from the middle of the bundle because the lumber is lashed together and forklifted around so the outside ones not only get indents from the strapping but they tend to get damaged from bumping into things while in transit. For the ply, I debated going with OSB (Oriented Strand Board) which is cheaper, but they were a little too splintery for my taste so I sprung for the slightly more expensive sheets of CDX/RTD sheathing ply. Living large, people! I gave the plywood a once-over on both sides for any extra crazy knots and any bad damage on the edges.
My new bff at the store was very friendly and cut everything down for me lickety split.

Once I had everything dragged down to the basement, it was time to get down to business. Shout out to apple music for the 90’s hip hop mix that day, that was pretty solid music fuel.
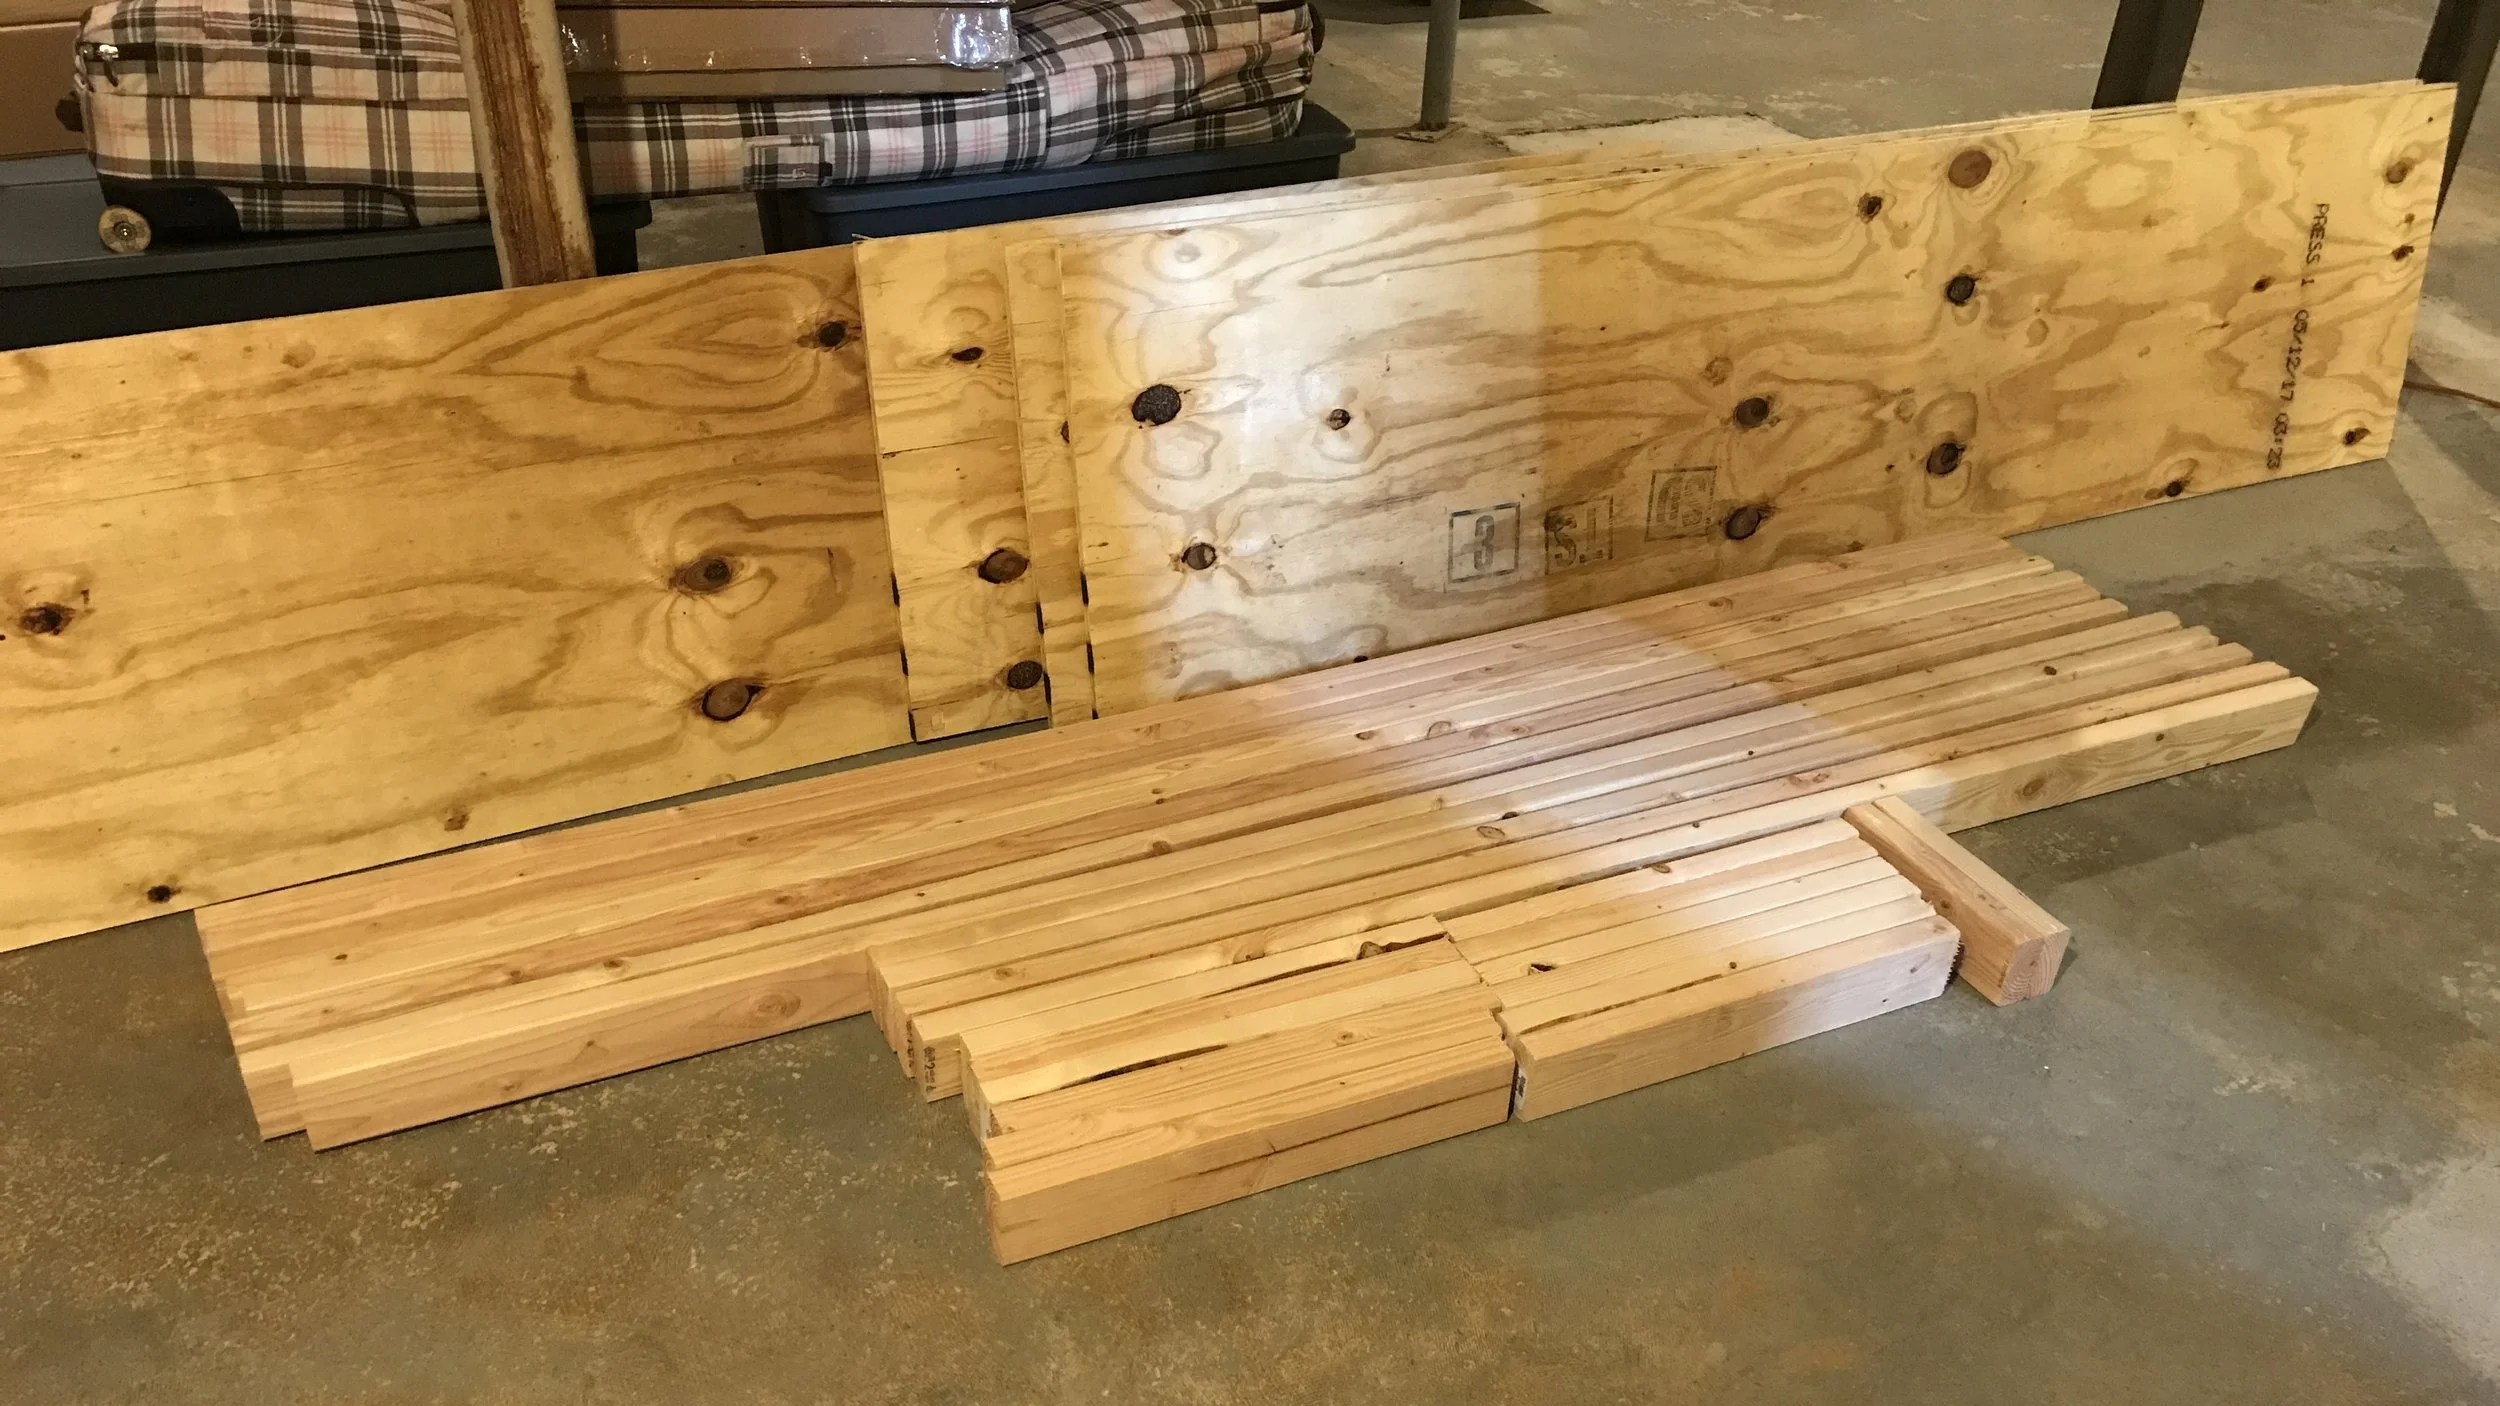
Here's a quick visual of what the different pieces were for.

Oh, and here's the screws I used. Probably could have gotten away with 2-1/2" screws, or sized up to 3-1/2". Side note - the star tips didn't strip. Like, not a single stripped screw. Amazing!

Each shelf was going to be a simple ladder frame with a sheet of plywood on top. I simply butted up the ends of the two-bys and put 2 screws through, right into the end grain. Then I laid the frame down flat and put a piece of plywood on top and put 6 screws in through the plywood into the frame. I used 4 screws in the corners plus 2 in the middle to take out any bowing.


Here's a close up of those joints.

Rinse and repeat to make 4 identical shelves. Here’s what the bottom of each finished shelf looks like.

Once that was all done, it was time to put this baby together. I chose to attach everything together with the unit laying down on it’s side on the floor, and then tip the whole thing upright once assembled. I knew it was going to be heavy to tip up, but a LOT easier than trying to attach all the shelves with the unit standing up. Can you imagine trying to hold up all the corners of each shelf at the correct height, keeping it all level, and screwing it together? Oh and don't forget holding up the two-by that's serving as the leg that you're working on. Recipe for frustration. No thanks. Are you an octopus? Because I'm most certainly not.
I don’t even really like to measure more than I have to. To mark out the legs, I laid down all 4 of the legs on the floor nice and cozy against each other, made sure the ends were lined up, and drew my lines across all 4 legs at once using a straight edge. For the sake of clarity, I marked where both the top AND bottom of each of the shelves should hit. This isn't a time to be sloppy though, so I definitely double checked those measurements and made sure it matched my sketch.
Then I laid out 2 of the legs on the floor, a little less than 8 feet apart from each other, stood a shelf on top of them, lined up one end of the shelf to my first set of marks, and put 3 screws through the shelf frame and into leg #1. I kept working on the same leg, moving on to attach shelf #2, then #3, and #4 before scooting over to tackle leg #2. While I was fastening the shelves to leg #1, I didn’t worry too much about leg #2 moving around, it was there primarily to keep the shelves off the floor by the same amount as the leg I was working on. And to avoid having to slide leg #2 under the awkward-to-lift and partially-assembled shelving unit. Once leg #2 was done, I moved on to attaching the other 2 legs. For these, I simply put each two-by leg on top of the shelves and put 3 screws through the face of the leg into the two-by frame of each shelf (vs through the frame into the leg earlier for legs #1 and 2). Sorry, forgot to take photos of this part. I think I got carried away jamming along to some 2Pac around this time.
Then came the moment of truth - time to tilt the beast. And you know what? It wasn’t as hard as I thought it would be. No, it wasn’t light, but very manageable for two people. However, a very important note here: if you go for the same tipping method as I did, make sure to consider your ceiling height and the diagonal height of your assembled shelving unit. Here's what I mean.

Remember trigonometry? Pythagorean theorem. What's that you say? You slept through trig? I gotcha. What you really mean is that trig was a long time ago. Wink wink. That's ok, it was a long time ago for me too. Here's a calculator, and it's not a TI-82. Thank the internet.
For me, the 75” H x 2 feet deep unit when tilted was a diagonal length of 79". My maximum height before obstructions was 85" so I was in the clear. Remember to take into account any light bulbs, piping, duct work, or other obstacles.
And finally came the best part - loading her up!

Now isn't that a real glamour shot? Hey, I warned you that this wasn't on the house tour for guests.
I have a lot more things and plenty of capacity left, but I was able to quickly and neatly stow away a bunch of things that were just cluttered around on the floor. And that makes me a happy camper.
Now that I've shown you mine, it's time for you to show me yours! Do you have a pile-of-shame? Or are you neat and tidy? Share your solutions! And if you DIY your own shelves too, tell me how it went!

Need a Pinterest-friendly recap? Here you go.